Img2ozf
Description of Img2Ozf program Fields and Buttons
"Map Conversion" Tab

Fields
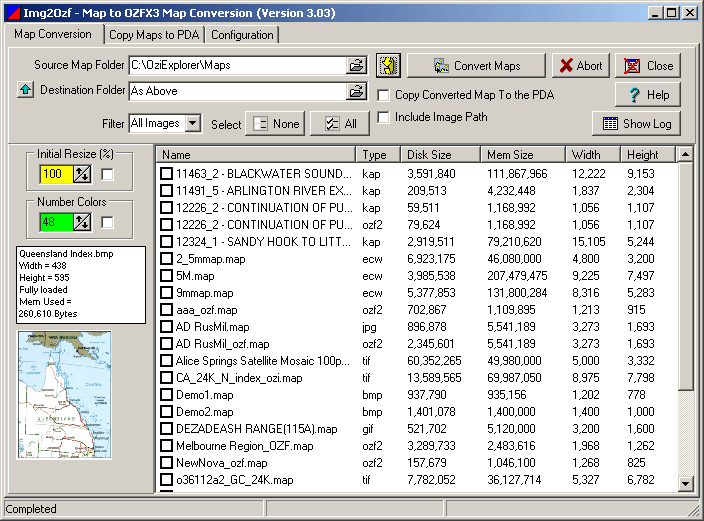
Source Map Folder - Use the button on the right hand end of the field to select the folder where the map(s) to be converted are located. The (.map) files will be listed. If the corresponding image cannot be found, the map file will not be listed.
Destination Folder - The folder where the converted images are saved.
The button with the Up arrow
![]() will make the folder the same as the Source folder.
will make the folder the same as the Source folder.
Include Image Path - If selected, the full path to the converted image will be included in the map file.
Copy Converted Map To The PDA - If selected, after converting the maps the new map(s) will be transferred to the PDA. (Both the map file and image file will be copied, the original will not be deleted from the PC.)
Note : The PDA must be connected via Activesync to be able to copy maps to the PDA.
Initial Resize - Set the new image size as a percentage of the original image if the checkbox is selected. The resized image will become the 100% image in the OZFx3 file. The last resize setting used will be saved but you must always tick the checkbox if you want the initial resize done. Note: Unless you have a specific requirement to have the image resized the value should be left at 100% for most conversions.
Number Colors - This specifies the number of colors to use in the converted image. You must always make sure the checkbox is ticked if you want the color reduction done.
- Reducing the number of colors gives smaller files as compression is improved.
- If the number of colors specified is too small the image quality will be reduced.
- The minimum number of colors which can be specified is 8.
- Images which have 256 colors or less will take longer to convert as the color reduction function needs to be done. Images which have 16 million colors will take no longer as a color reduction is performed anyway.
In general
- 48 colors will show no significant reduction in image quality (this is the default).
- Less than 48 colors will gradually reduce the image quality until at 8 colors the image quality will be very poor.
- 32 colors seems to be a good compromise if a reduced image size is a requirement.
Note : Some images (especially dedicated mapping formats) already use a small number of colors, so specifying color reduction will have minimal affect on image size or quality, but it will take longer to convert the images as the color reduction function will still be performed.
USGS DRG maps are an example of maps which use few colors.
Map File List - The list of files in the Source Image Folder that can be converted. You can select as many files in the list as required using the "Shift" or "Ctrl" keys while clicking on the image name. The list can be sorted on a column by clicking on the column title. (eg to sort on Image Type, click Type). The list can be filtered using the "Filter" box.
Filter - The list of images can be filtered. Select the image type from the dropdown box.
Select (None/All) - To deselect current selections or to select all of the images in the list.
Buttons
![]() Refresh - Forces a refresh of the image list. Useful if
you have added additional images into the folder while Img2Ozf is running.
Refresh - Forces a refresh of the image list. Useful if
you have added additional images into the folder while Img2Ozf is running.
Convert Maps - Starts converting the images.
Abort - Aborts the process. The abort may not be immediate as some parts of the process cannot be interrupted.
Show Log - Displays a window which lists the images converted and their status.
Help - Runs the Img2ozf Help.
Close - Closes the program.
Progress Information
Image Details Box - The box will display information about the image which is being converted. The information shown is the image file name, image size, whether the image is fully loaded or paged and the memory required.
Image Thumbnail - A thumbnail of the image will be shown during the conversion process.
Status Bar - The Status Bar at the bottom of the window will display information during the conversion process.
"Copy Maps to PDA" Tab
This page is designed to help transfer maps suitable for using in OziExplorerCE to a PDA. Only maps that can be loaded in OziExplorerCE will be listed in the Map List.

Options/Buttons
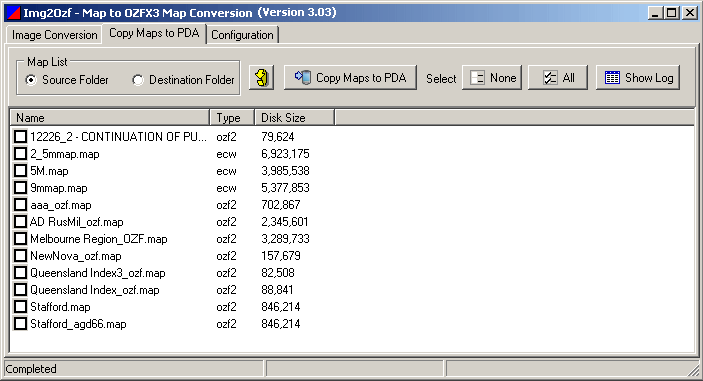
Map List display option - Us this option to select the Source or Destination folder and to list the maps which are suitable to copy to the PDA. Valid formats are (.ozf2), (.ozfx3) and (.ecw). Maps which do not have both a map file and the corresponding image will not be listed.
![]() Refresh - To refresh the list.
Refresh - To refresh the list.
Copy Maps to PDA - Start the copy process. The two files (map and image file) for the selected maps will be copied to the PDA.
Note : The PDA must be connected via Activesync to be able to copy maps to the PDA.
Select (None/All) - To deselect current selections or to select all of the images in the list.
Show Log - Displays a window which lists the images transferred and their status.
"Configuration" Tab

Folders on the PDA
Map Folder on the PDA - Use the button on the right hand end of the field to Browse and select the folder where the maps (.map files) will be copied to. The PDA must be connected to the PC to use this Browse dialog to select a folder.
Map Image Folder on the PDA - Use the button on the right hand end of
the field to Browse and select the folder where the maps images (.OZFx3 files)
will be copied to. The PDA must be connected to the PC to use this Browse dialog
to select a folder. The button with the Up arrow
![]() will make the folder
the same as the Map Folder on the PDA.
will make the folder
the same as the Map Folder on the PDA.
OziExplorerCE PDA Program Path - Use the button on the right hand end of the field to Browse and select the folder where the OziExplorerCE program is installed (The path is normally "\oziexplorer"). The PDA must be connected to the PC to use this Browse dialog to select a folder.
Folders on PC
Temp File Folder - The conversion process may need to create some temporary files, this specifies the folder where the temporary files are placed. Temporary files are removed after the conversion process.